After creating layout boundaries we can proceed with building the PV system.
There are 2 options for a rooftop PV system:
- Build roof single (North or South facing)
- Build roof East-West
Build roof single
To build a single oriented rooftop PV system select the “Build roof single” option. A popup will open where all the specifications for this setup can be entered.


First of all the preferred module has to be selected. In the modules section the right one can be found by filtering on brand, type or power.
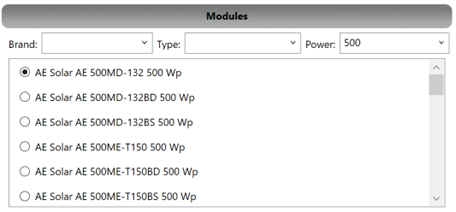
After selecting the module we can start filling in the parameters in the common section.
- System: Here the choice can be made between a tilted system or a system that is parallel to the roof surface.
- Tilt angle: Here the angle (in degrees) can be entered at which the panels should be tilted.
- Horizontal module spacing: The horizontal space between modules.
- Vertical module spacing: The vertical space between modules (only accessible with parallel system).
- Vertical stacking: the amount of modules placed on top of each other in a tilted system.
- Vertical stacking spacing: the vertical space between those panels stacked on top of each other.
- Shadow angle: A generic angle value must be entered here, this will be used to calculate the shadows generated from panels and other 3D objects to create a shadow free system.
- Create 2d modules: when checked this option will build the PV setup as 2D instead of 3D, this might help gain some performance on very large projects.
- Orientation module: Here the choice can be made between landscape or portrait orientation of the panels.
- Height above the surface: The height at which the modules are placed above the roof surface.
- Align to: These are the options that determine the placement of the panels, you can align panels to the gutter, center or ridge of the roof.
- Align rows: This option allows you to align rows between different layout boundaries.

All of these settings can be filled in manually or you can load any of our presets created for integrated mounting systems such as: Avasco, Van der valk, Sunbeam, Blubase, Esdec and CPX.
To load your preferred system select the settings option on the top left now press load and a popup will appear with all the available systems.
Select the preferred system and press ok, all settings will be loaded in the common section.

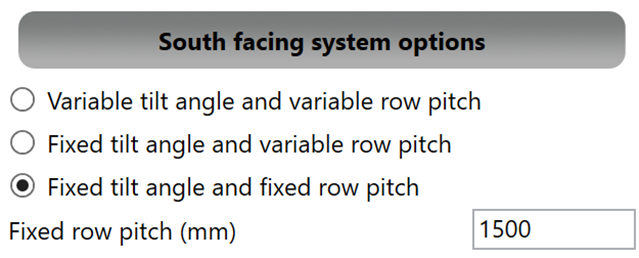
In the south facing system options you can define if tilt angle and row pitch should be fixed or variable for the system build.
In the gap definitions section you can add certain gaps in the system. Specify the size of the gap, the amount of rows/columns after which that gap should be created and finally check the box on the left to confirm the use of these gaps.

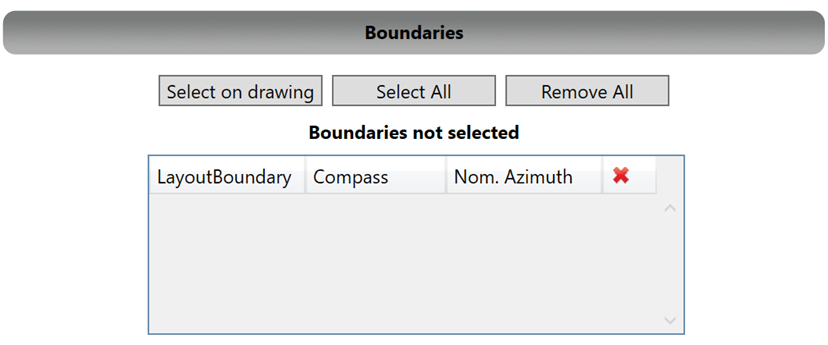
To choose the area in which to build your PV layout navigate to the boundaries section. Here the options are to select a boundary manually by pressing “Select on drawing” then pick a point inside of the blue PV boundary. You can also select all boundaries with the “select all” option and remove all as well to remove the selected boundaries.
As the final steps you can set the accuracy for the build and select the build roofless mode if needed.
- The positioning accuracy sets the interval distance for searching the best position to place your racks. It can be set from low (5000mm) to high (100mm).
- Build roofless allows you to build a rooftop setup on the ground level.

You are now able to save this setup for future projects in the top left and proceed with building by pressing the “Build” button.
