
In the inverter configurator you can define the electrical properties of your project.
You can find the button to access the inverter configurator at the following location:

Creating groups
The first option in this window is to create groups of modules that require separate configurations. The group option requires a few inputs:
- Group name
- Sub group by rows
- Sub group by East/West
- Layer color
- Max count of modules or KWP

Group name
This is the name that will be used for the layers and displayed on the project.
Sub group by rows
This option will automatically create a sub group for each row on the system. This way different rows with different shading levels can be put on separate MPPT's easily.
Sub group by East/West
This option will automatically create sub groups for East and West facing modules to make sure those can be set on separate MPPT's easily.
Layer color
Choose a color to represent this group and any associated subgroups.
Max count of modules/kWp
You can also establish a limit for the number of modules or racks to be included in this group, allowing you to specify either a total number of modules or a kilowatt peak (kWp) value. During the selection process, if you exceed the established limit, a notification will appear to alert you.
system configuration
No it's time to set up our preferred configuration.
- Select Module: In this section, you will specify the module that will be utilized for the group. Only the modules that have been added to the project will be available for selection.
- Transformers: Here, you will choose the appropriate transformer to be employed in the configuration.
- LV Cabinets: Select your preferred low voltage (LV) cabinet from the options available.
- Inverters: Pick an inverter from the comprehensive database provided.
- Parallel strings: Turn this option on to use Y-connectors
- Combiner box: Select this option if your configuration includes the use of combiner boxes to optimize the wiring of your modules.
- Now specify the number of modules you wish to connect in each string.
- Click the Add Configuration button to finalize and create your selected settings.

Overview
In the overview section you can adjust your created configuration.
You can expand each inverter entry to view detailed information about the components that have been added. From this section, you have the flexibility to delete, duplicate, or modify any component to ensure it aligns with your project requirements.
You will also need to assign these devices to the appropriate wiring group.
The alternate option allows you to automatically divide MMPT's across East and West groups.
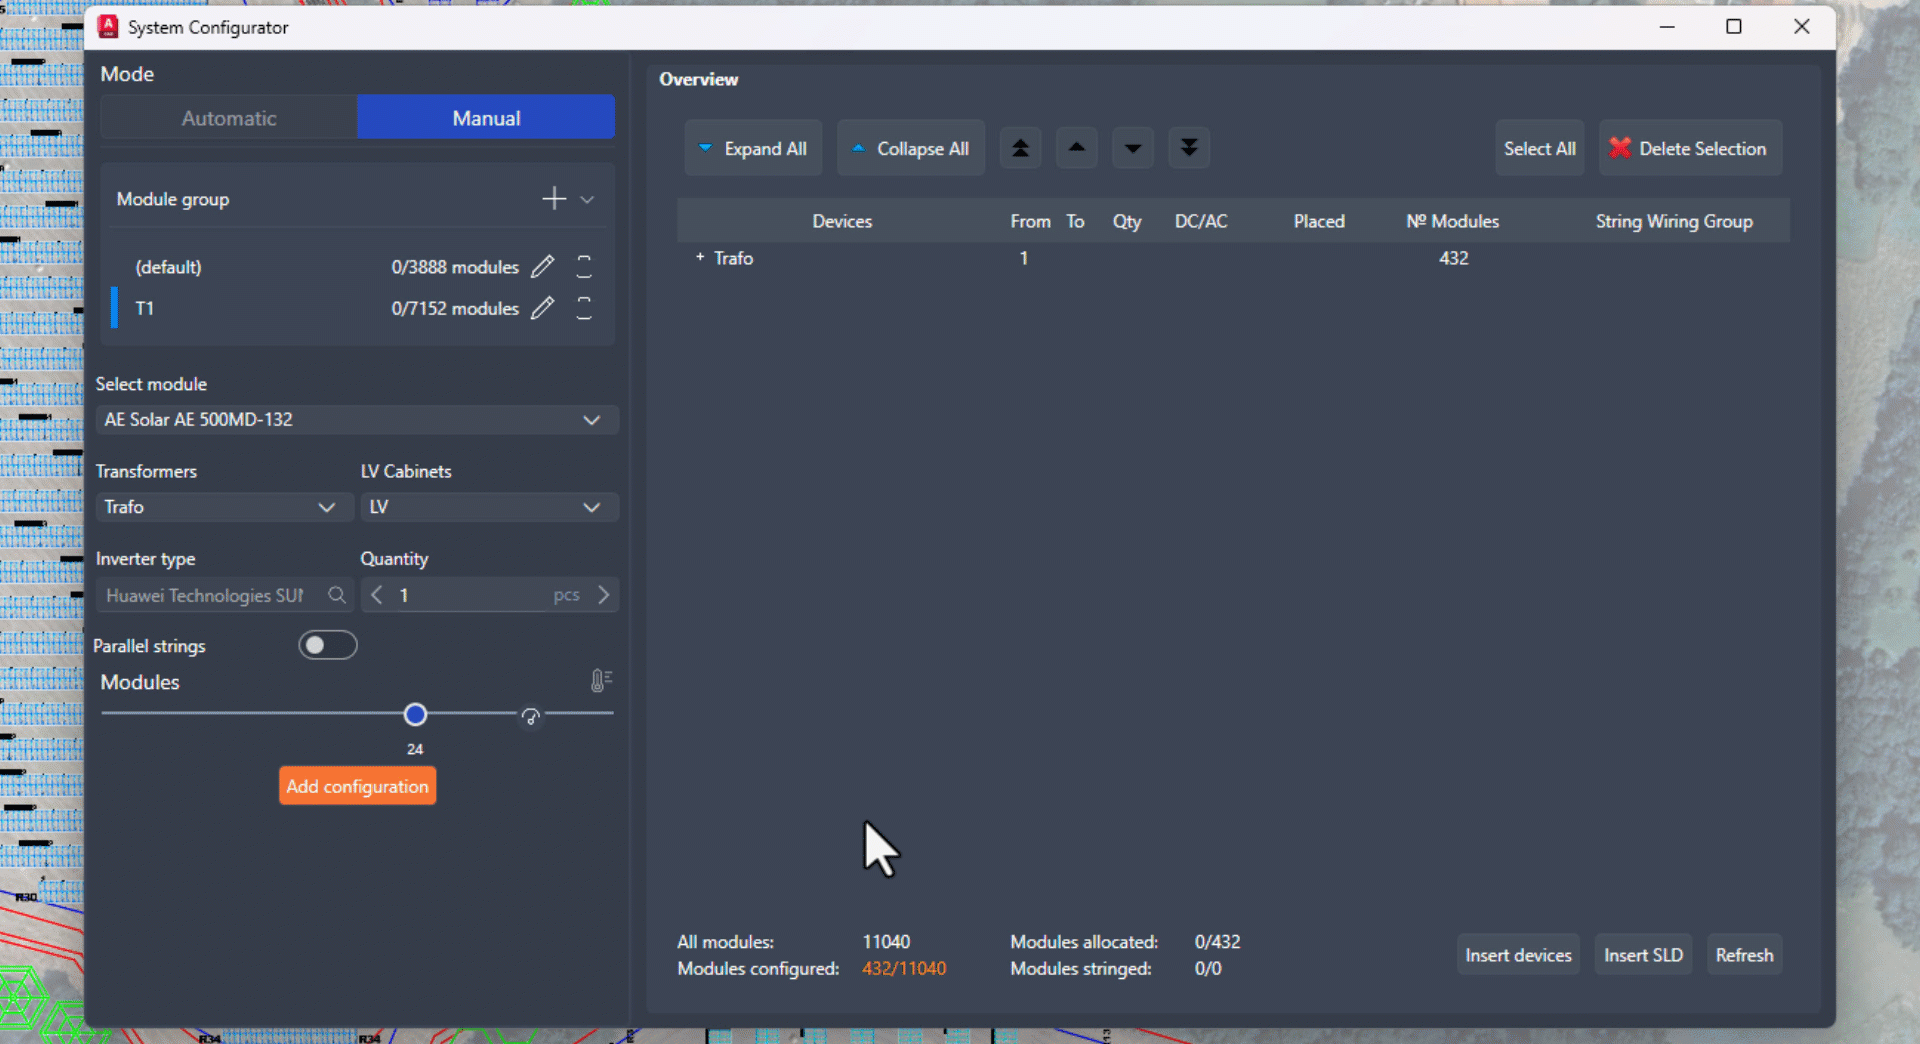
On the bottom right there are 3 buttons available:
- Insert device
- Insert SLD
- Refresh
Insert device
Using the Insert Device feature, you can seamlessly add all listed devices to your project. Please note that while the placement of transformers and LV cabinets requires manual positioning, the remaining devices can be inserted automatically for your convenience.
The automatic options are:
- Along tray: Manually select the tray or trench next to which the devices need to be placed.
- Automatic: The system will place the devices based on of two options.
- Polarity: places the devices in the field close to the strings linked to that device
- trench/tray: places the devices next to a predefined trench or tray on your drawing while still remaining as close as possible to the right strings.

Insert SLD
With this option you can insert a single line diagram on your project.

Refresh
The refresh button will refresh the configuration in the case it didn't automatically update.