![White full logo.png]](https://help.virto.solar/hs-fs/hubfs/White%20full%20logo.png?height=40&name=White%20full%20logo.png)
Select a surface
- Continue to Module Layout.
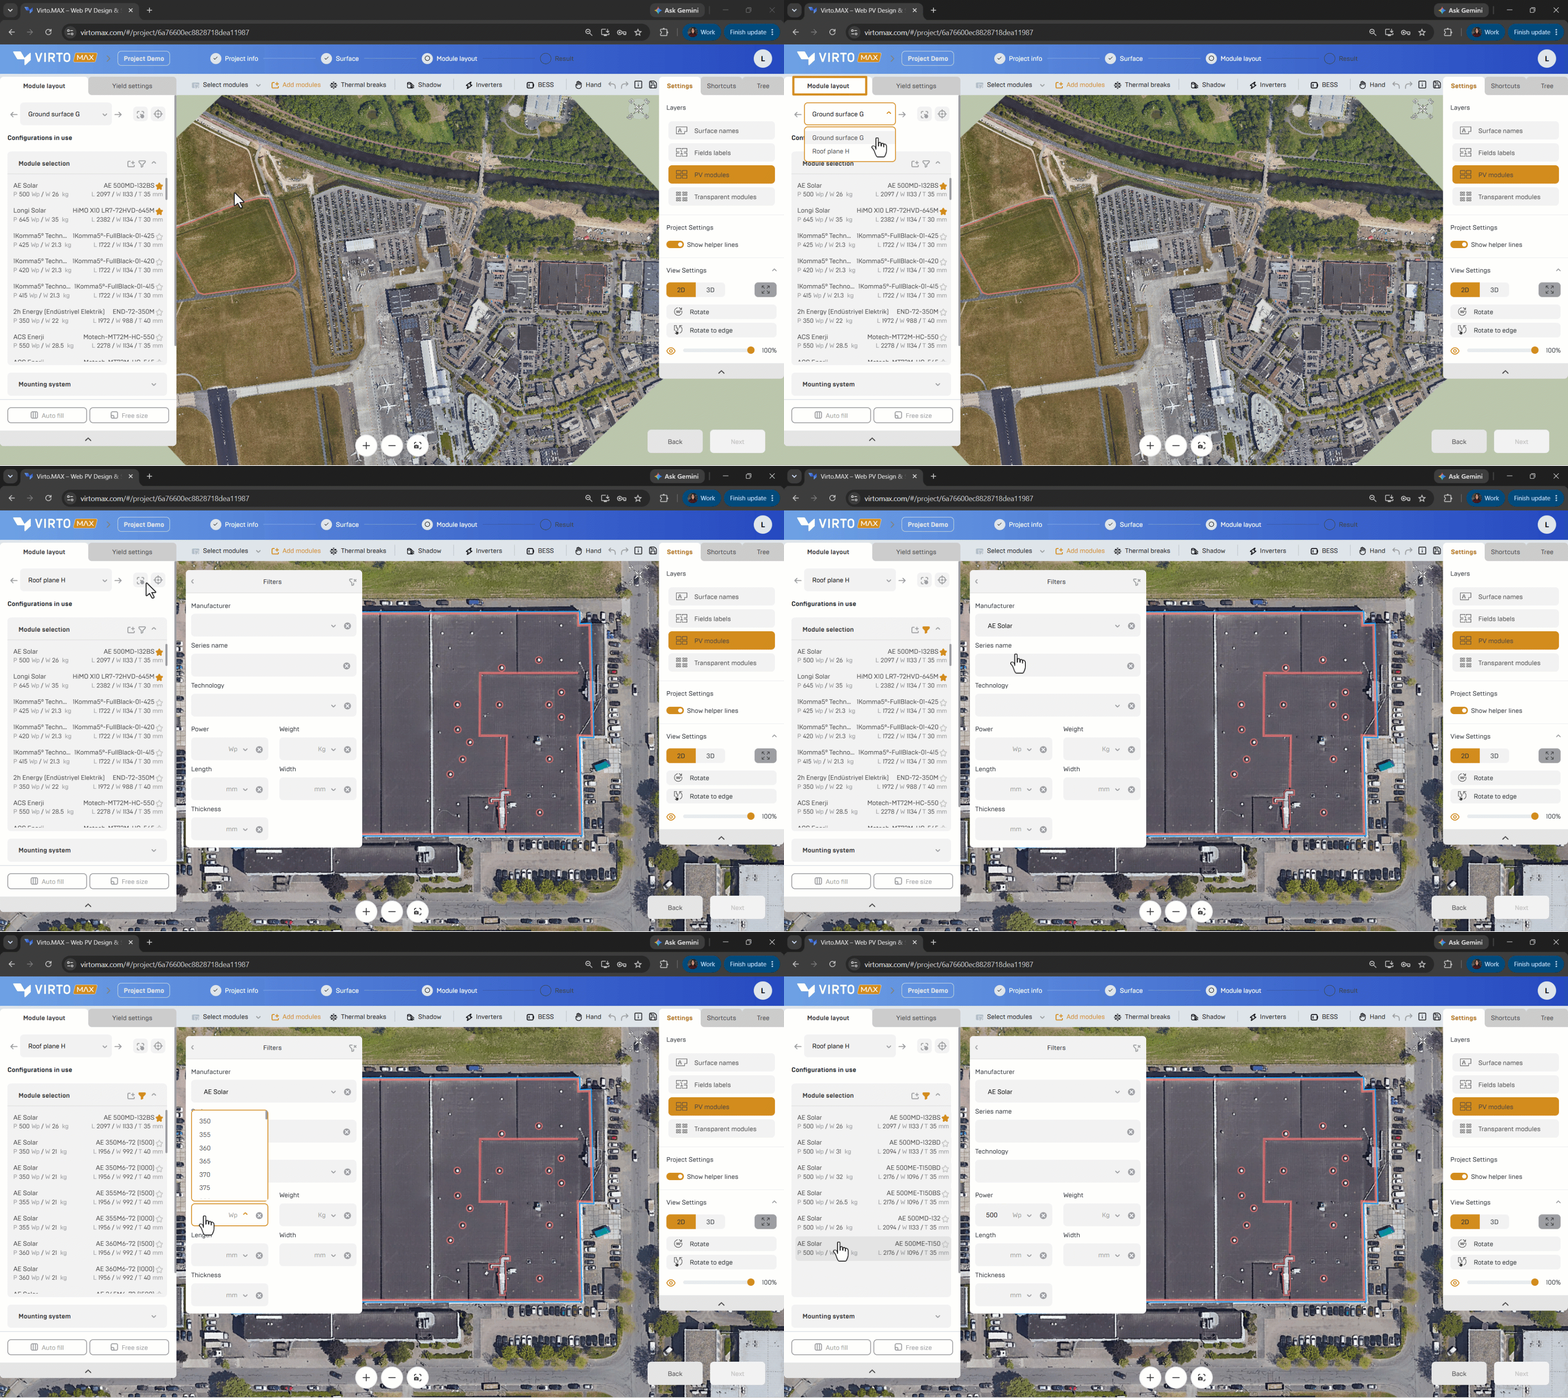
- Select the roof face, carport or ground surface. Use roof cycling to select a different surface.
- Confirm that the selected surface is highlighted before changing the layout settings.
Select a module
- Look for the preferred module by filtering the database
- Select the required panel.
- Add a missing panel manually or upload its .PAN file.
Select or create the system
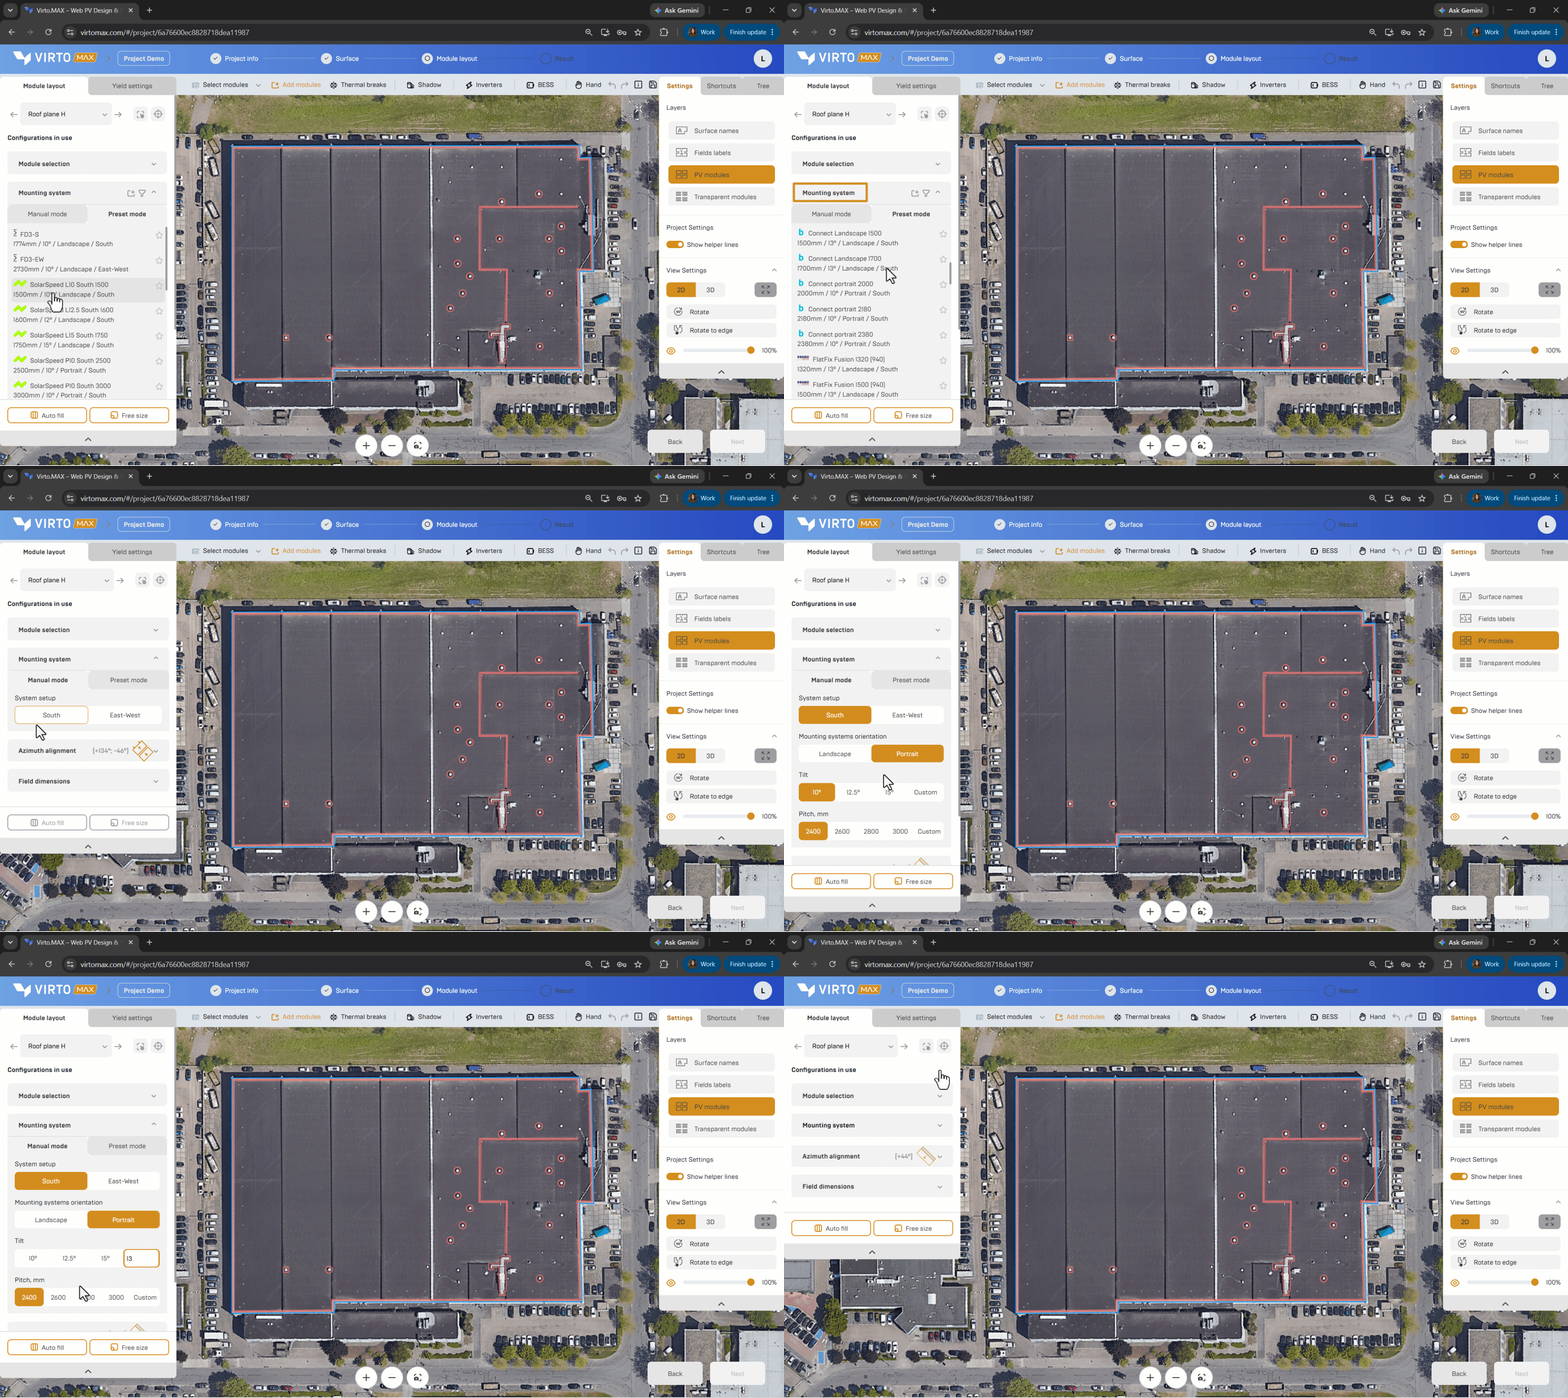
Roof Configuration
- Choose an available mounting system from Preset mode or add a custom configuration from Manual mode.
- Define the setup, orientation, tilt, and pitch that apply to the configuration.
Ground Configuration
- Choose an available Mounting System or add a custom configuration by defining all parameters.
- Define the pitch by choosing whether to position the racks based on Shadow Angle or Fixed Tilt.
Carport Configuration
- Choose an available Mounting System or add a custom configuration.
- Define the Carport Spacing and Panel Parameters.
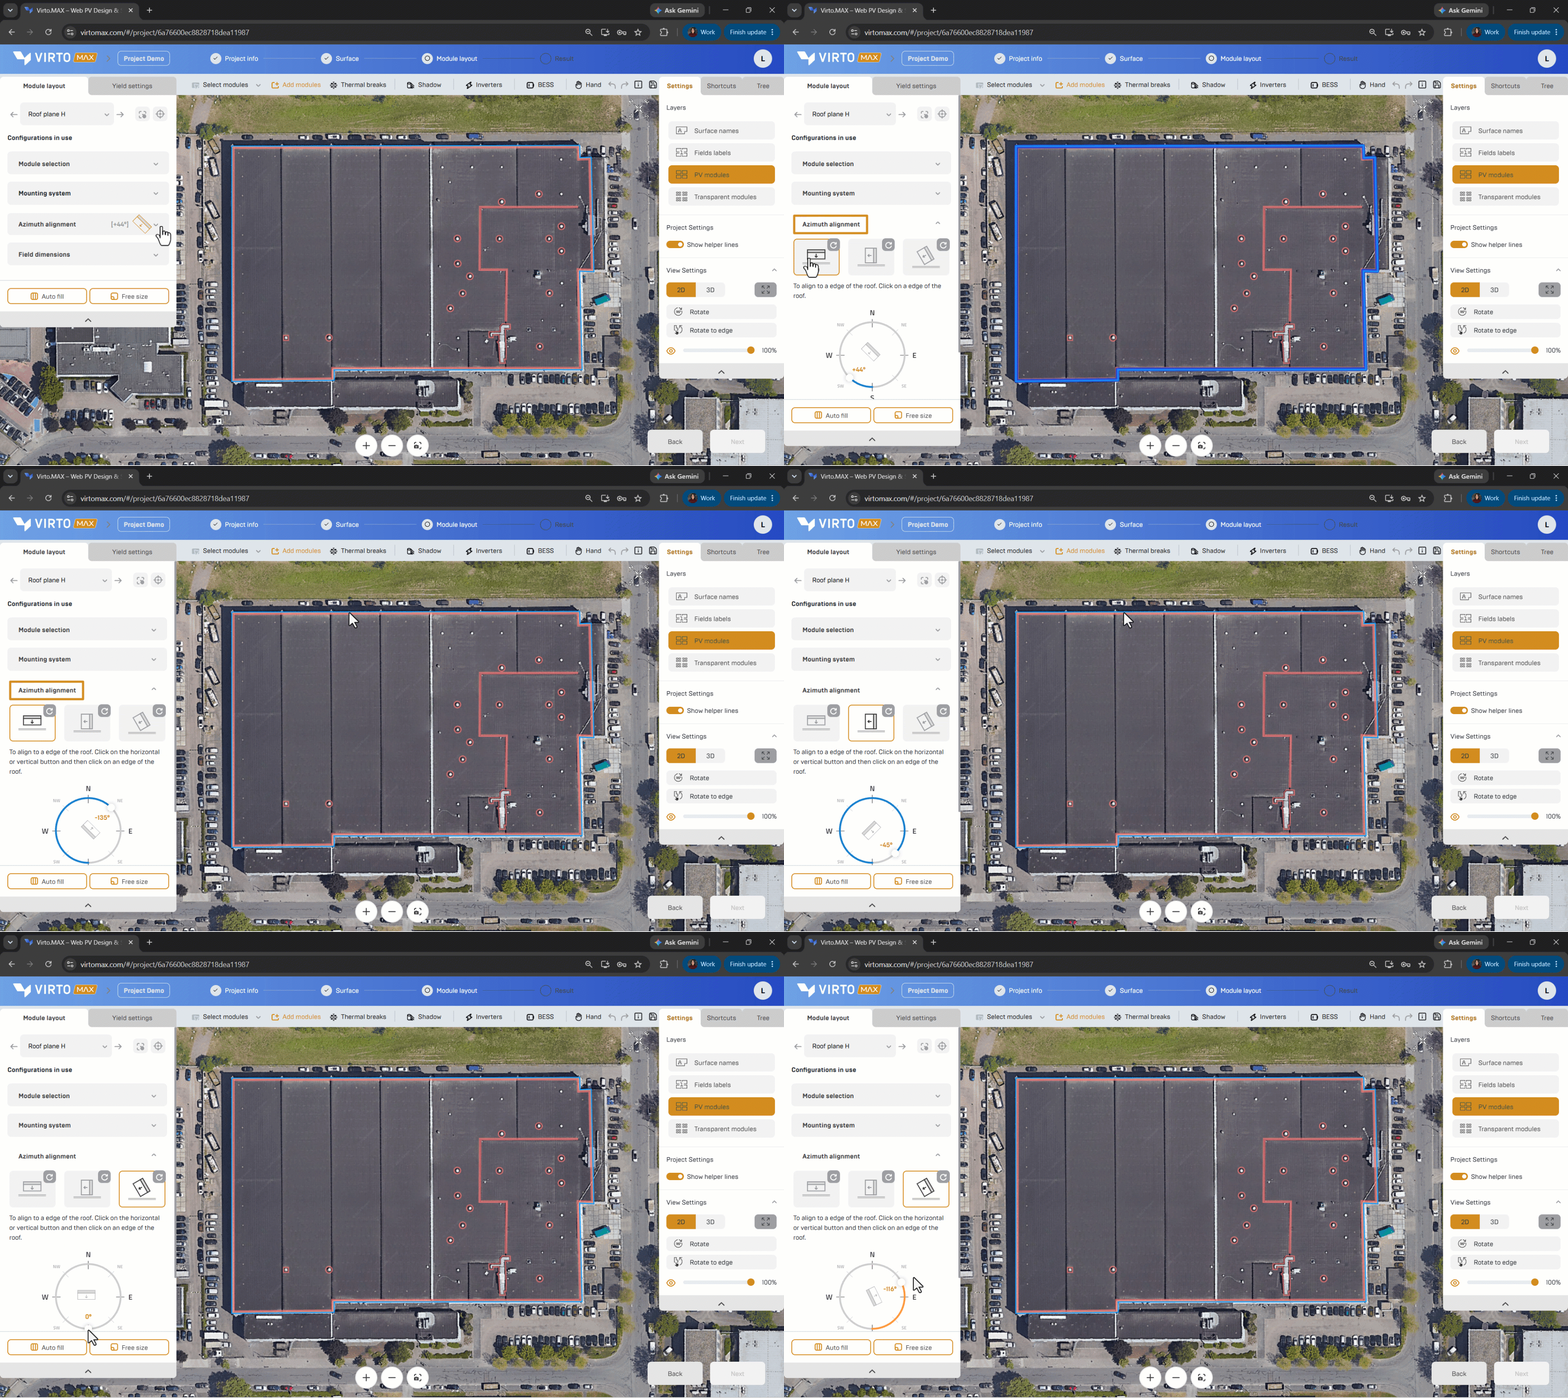
Align the layout
Choose one of the available alignment methods:
- Exact azimuth with the compass.
- Long side aligned to a selected surface edge.
- Short side aligned to a selected surface edge.
Configure thermal breaks or field-size limits where required on the Field Dimensions dropdown.
Place modules or racks
- Select Autofill to fill the usable area automatically.
- Select Free size to define a smaller placement zone manually. Click and drag.

Use helper lines and snapping to align fields with edges or with other module groups.
Inspect the layout after placement and check edge distances, obstacles, access zones, spacing, and module-field distribution.
Next step: Edit a module layout.